Monthly Payments as Low as $99! | 1/2 OFF Labor on second Project
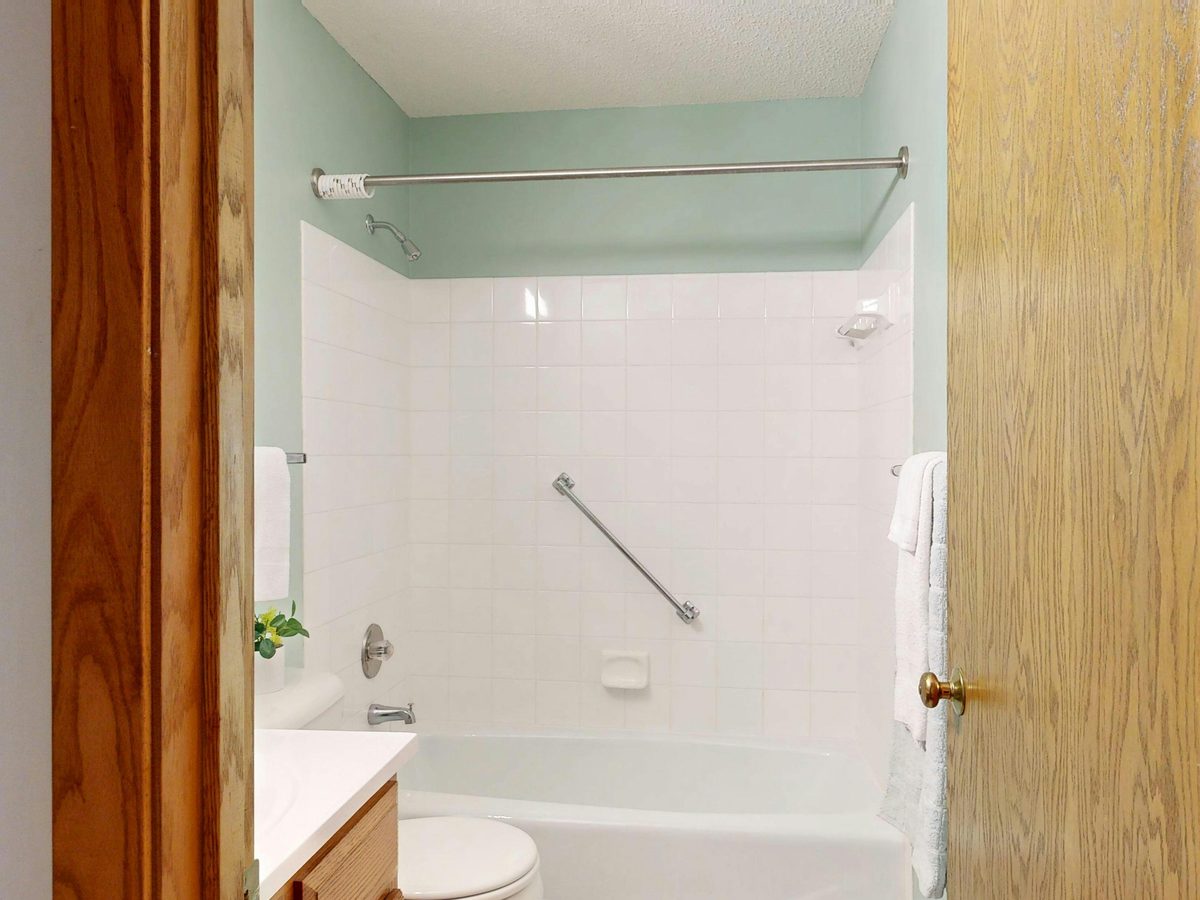
A tub-to-shower conversion replaces an existing bathtub with a walk-in shower. It’s one of the most practical bathroom upgrades a homeowner can make. This tub-to-shower process guide covers every phase, from planning through final inspection. Whether you’re following this as a bathroom remodel tutorial, researching shower conversion steps, or simply deciding if the project is right for you, every section is written to give you clear, direct answers. Here’s what the process actually looks like, what it costs, and what to expect along the way. If you have questions not covered here, the Patriot Bath FAQ has answers to the most common homeowner concerns.
Key Takeaways
A tub-to-shower conversion removes the existing bathtub and replaces it with a walk-in shower. It can be as straightforward as installing a prefabricated kit or as involved as a fully custom tile build. Not sure whether a conversion is enough or whether a full bathroom remodel makes more sense for your situation? The scope of your goals will determine which direction is right. Either way, it requires plumbing work, proper waterproofing, and a licensed contractor in most states.
Safety drives most conversions. High-sided tubs are a leading cause of bathroom falls, especially for older adults. A walk-in shower with curbless, zero-threshold entry removes that hazard entirely. Grab bars anchored into wall studs at the ADA-specified height of 33–36 inches reduce fall risk further. Add a fold-down bench and a handheld showerhead, and the shower supports aging in place comfortably.
For many households, the tub simply doesn’t get used. Converting it to a walk-in shower turns an underused fixture into something functional every day.
The right choice depends on your priorities.
Choose a custom tile shower if long-term value matters most. It offers superior durability, full design flexibility, and the strongest return on home resale value.
Choose a prefabricated unit if budget and speed are the priority. Installation is faster, the upfront cost is lower, and day-to-day maintenance is minimal.
Both options use less water than a standard bath, which lowers utility costs over time. In smaller bathrooms, removing the tub also frees up meaningful floor space.
A full conversion follows eight sequential phases. Each one must be completed correctly before the next begins. Skipping steps, especially waterproofing, leads to expensive problems down the road. Here’s what the shower conversion steps look like from start to finish. The sequence matters because each phase creates the foundation for the next. Plumbing must be roughed in before walls go up. Waterproofing must cure before tile is set. Tile must fully set before grout goes in. Cutting corners at any phase creates problems that only surface after the walls are closed and the project is signed off.
This is the longest phase: 1–3 weeks. Homeowners finalize the design, choose materials, hire a licensed contractor, and pull permits. In Massachusetts, plumbing, electrical, and building permits are required before any physical work begins. Don’t rush this phase. Decisions made here affect every step that follows. Use this time to collect at least three contractor quotes. Confirm each contractor is licensed and insured before signing anything. Set a clear scope of work in writing. Material selections made now, rather than mid-project, prevent costly delays later.
Demolition takes 1–2 days. The tub is disconnected and removed, and the surrounding walls are stripped to the studs. This is when hidden problems, including water damage, mold, and structural issues, get discovered. Finding them early is better than finding them after the walls are closed. A thorough contractor documents any damage found and walks you through the options before proceeding. In older Massachusetts homes, lead paint or asbestos may be present in the existing wall materials. If found, licensed abatement is required before demolition continues. Budget time and cost for this possibility if your home was built before 1980.
The rough-in phase takes 2–4 days. A licensed plumber relocates the drain, installs the shower valve, and runs supply lines. A licensed electrician handles the GFCI outlet and the ventilation fan concurrently. Both trades must be licensed; permitted work done otherwise is a liability. In Massachusetts, rough-in plumbing and electrical work must each pass a separate inspection before walls are closed. Your contractor should schedule these inspections proactively. Failing to do so can mean walls are reopened after the fact. The rough-in inspection also confirms the drain relocation meets slope and code requirements.
The floor system starts with a sloped mortar bed to direct water toward the drain. A PVC or CPE pan liner goes in next, forming the first waterproof barrier beneath the finished floor. The base must be level and fully supported before any wall installation begins. After the liner is in, a flood test is performed. The drain is plugged and the pan is filled with water for 24 hours to confirm no leaks exist. This test must pass before wall installation begins. Some municipalities in Massachusetts require the contractor to document the flood test results for the permit file.
Wall and tile work takes 3–5 days. Walls are sheathed in cement backer board first. It’s the moisture-resistant substrate that tile adheres to. For custom tile, each course is set, grouted, and initially sealed in sequence. Built-in niches and shelving are framed and tiled during this phase as well. Proper curing time between each stage matters. Rushing tile work leads to lippage, cracked grout lines, and callbacks. Most tile contractors allow 24–48 hours between setting and grouting to ensure full adhesion before the next step begins.
Fixtures and finishing take 2–3 days. This includes installing the showerhead and controls, fitting the glass door or enclosure, and caulking every seam. High-end builds may also add built-in benches, multiple showerheads, or a steam system at this stage. The showerhead, valve trim, and controls connect to the rough-in plumbing from Phase 3. Before the final wall finish goes in, confirm the valve cartridge is accessible for future repairs. Glass doors require precise measurements taken after tile is complete, not before, to ensure a proper fit and a watertight seal at every edge.
Waterproofing failure is the most common and most costly mistake in any shower installation guide. A proper system includes the sloped mortar bed, a PVC or CPE pan liner beneath the floor, and a membrane applied across all wall surfaces. Every seam, corner, and penetration must be fully sealed. Grout lines get sealed only after the tile has completely cured.
Choose a contractor who treats waterproofing as a dedicated phase, not an afterthought between tile and fixtures.
In Massachusetts, the completed project is inspected under the MA State Plumbing Code (248 CMR 10.00) and the MA State Building Code (780 CMR). The inspector confirms all work meets code before signing off. Once approved, the contractor clears the site, and the shower is ready to use. If the inspector finds deficiencies, the contractor must correct them before a re-inspection is scheduled. Common issues include missing GFCI protection, improper ventilation, or incomplete waterproofing documentation. A professional contractor resolves these at no additional cost to you. The permit is closed once the final inspection passes.
Cost varies widely depending on materials, scope, and location. In Massachusetts, expect to pay more than the national average across every tier. Knowing what drives the price helps you budget accurately and avoid surprises mid-project. A realistic budget starts with understanding the two biggest variables: materials and labor. Material choices alone can shift total project cost by thousands of dollars, depending on whether you choose a prefabricated surround or a full custom tile build. Labor costs in Massachusetts are higher than most states, driven by trade licensing requirements and local wage rates. Getting itemized quotes lets you see exactly where your money goes and where you have room to adjust.
Material choice is the biggest variable. The shower surround and plumbing consistently represent the largest line items in any mid-range budget. Relocating the drain or upgrading supply lines adds significant labor costs on top of that.
Location matters too. Massachusetts runs 15–30% above the national average overall. Boston and Cambridge carry the steepest premium, at 20–30%, due to high demand, higher wages, and the complexity of working in older historic homes. Coastal areas like Cape Cod and the North and South Shore typically run 15–25% higher, driven by seasonal demand and logistics. Suburban markets are more moderate, generally 10–15% above the national average.
Accessibility upgrades, structural repairs discovered during demolition, and permit fees all add to the final number.
Choose DIY if you have the skills and the project involves a simple prefab install with no plumbing or structural changes. Materials run $1,000–$3,000.
Choose a prefabricated professional install if budget and speed are the priority. A licensed contractor installs an acrylic or fiberglass unit for $3,000–$6,000.
Choose custom tile if design flexibility and resale value matter most. Mid-range projects run $6,000–$12,000 , with a typical Massachusetts conversion landing around $9,000.
Choose the upscale tier for a luxury build with natural stone, frameless glass, steam systems, or multiple showerheads. Expect $12,000–$25,000 or more.
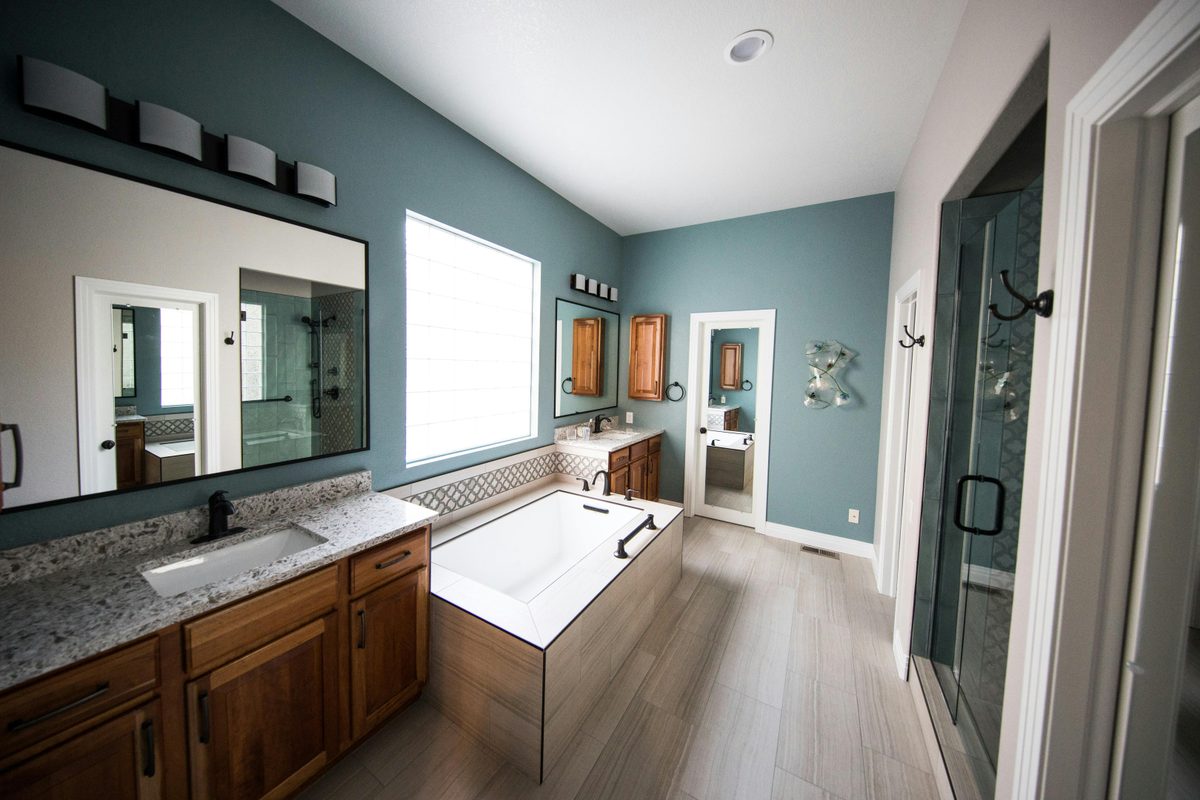
When it makes sense: A conversion is a good fit when the tub is rarely used, when safety and accessibility are priorities, or when the bathroom needs to feel larger without expanding the footprint. If the home has young children who rely on a tub for bathing, a full conversion may not be the right move.
How we compare: Patriot Bath Remodeling offers all four tiers with the same licensed crews and permit-pulled process. Unlike some national chain installers, we do not subcontract the plumbing or waterproofing work. Every phase is handled by our own licensed team, which gives you one point of accountability from demolition through final inspection.
Expected outcomes: A properly installed walk-in shower adds function, safety, and resale value. Most Massachusetts homeowners recoup 60 to 70 percent of project costs at resale. Accessibility upgrades may also qualify for state and federal tax credits depending on scope. A complete build with proper permits protects that investment for the life of the home.
Material and fixture choices define both the look and the long-term performance of the shower. If you’re still deciding between a shower liner and a full shower replacement, that decision affects which materials and installation path apply to your project. The right combination depends on your budget, maintenance tolerance, and design goals. Durability matters more in showers than in most other areas of the home. The space faces daily heat, moisture, and cleaning products. A material that looks great at installation but requires frequent resealing or replacement carries a hidden cost worth factoring in from the start.
Choose ceramic or porcelain tile for mid-range builds. It’s the most widely used option: durable, water-resistant, and available in a wide range of styles and price points.
Choose natural stone, such as marble, slate, or travertine, for luxury conversions. The aesthetic is unmatched, but stone requires more maintenance and careful sealing to stay water-tight over time.
Choose prefabricated acrylic or fiberglass if budget and low maintenance are the priority. These surrounds are easy to clean and hold up well with minimal upkeep.
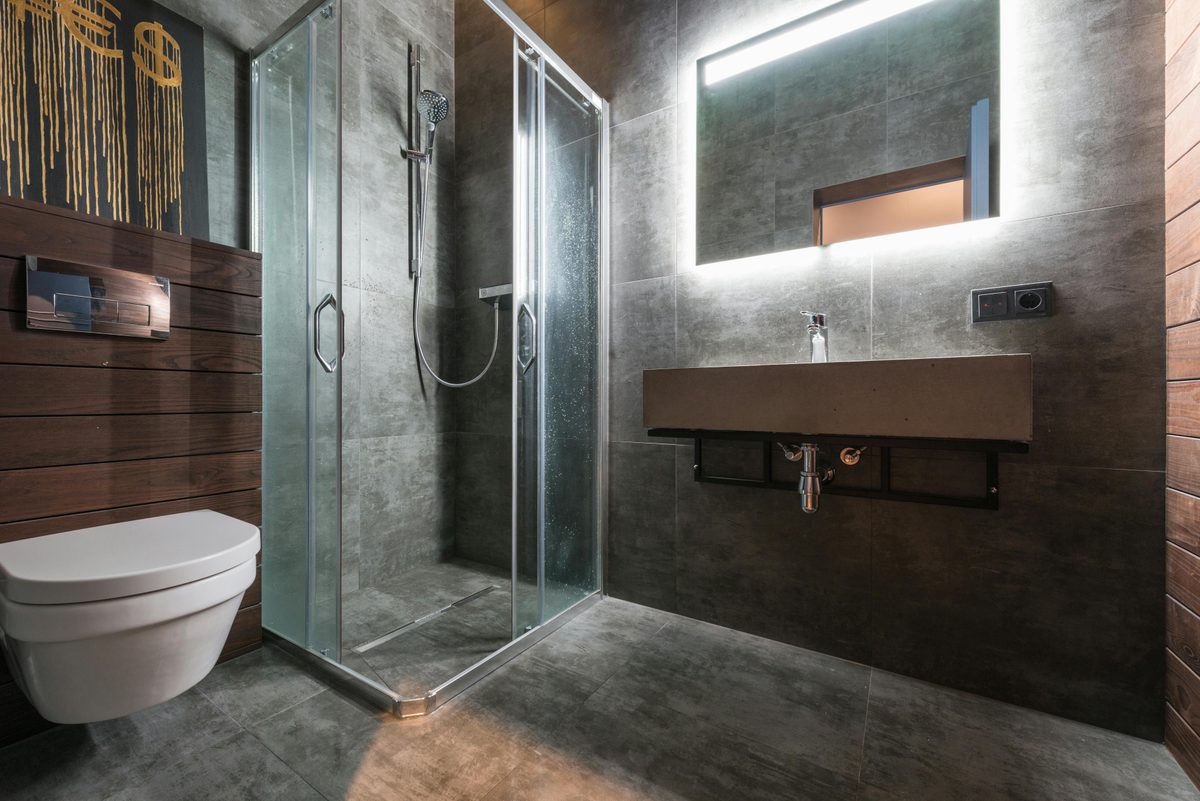
For a modern look, regardless of budget tier, large-format tiles (12×24 or larger) are trending. Fewer grout lines means less cleaning and a cleaner visual finish.
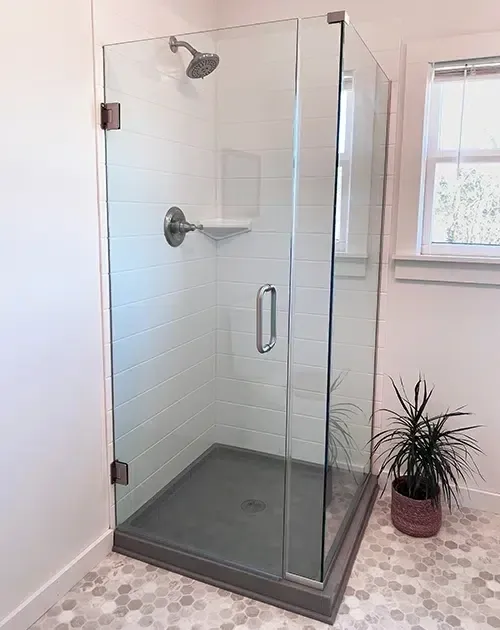
Fixtures do more than look good; they determine how the shower performs day to day. Frameless glass doors open up the space visually and are easier to clean than framed alternatives. For a spa-like experience, built-in benches, multiple showerheads, and steam systems move the shower beyond functional into a full retreat.
Fixture finish, such as brushed nickel, matte black, or polished chrome, should match or complement the broader bathroom design. Don’t treat it as an afterthought. Valve and trim selection matters equally: the right combination controls water pressure, maintains thermostatic stability, and holds up over years of daily use.
Most conversions take 2 to 6 weeks from start to finish. The physical work is a fraction of that. Planning, permitting, and material lead times make up the bulk of the timeline. Knowing what causes delays helps you plan around them. For context, the actual hands-on construction typically runs 7 to 14 business days. The rest of the timeline is coordination, approvals, and waiting on materials. Homeowners who make decisions early and choose readily available materials consistently finish closer to the shorter end of that range.
Project complexity sets the baseline. A basic prefabricated install runs toward the shorter end. A full custom tile conversion with structural modifications takes longer. From there, several variables can extend the schedule:
Permit approval varies by municipality, anywhere from a few days to several weeks. Specialty tile, custom glass doors, or imported fixtures can add weeks of lead time before physical work even starts. Hidden issues found during demolition, such as water damage, mold, or structural problems, pause the project until they’re resolved. Contractor and trade availability is another factor, especially during the busy spring and summer remodeling season, when scheduling plumbers, electricians, and tile setters in sequence takes longer.
The most effective thing you can do is front-load your decisions. Finalize all material selections before demolition begins. A mid-project wait on a backordered tile or custom door can stall everything for weeks.
Coordinate all trades, including the plumber, electrician, tile setter, and glass installer, before work starts so each phase flows directly into the next. If this is the home’s only shower, arrange temporary bathing accommodations before day one. Discuss working hours, home access, and daily clean-up expectations with your contractor upfront. Clear communication at the start prevents friction throughout.
A tub to shower conversion is one of the most practical upgrades you can make: safer, more functional, and built to last. Whether you’re working with a tight budget or planning a full luxury build, the right contractor makes the difference between a project that runs smoothly and one that doesn’t.
At Patriot Bath Remodeling, we handle every phase: design, permits, plumbing, waterproofing, and final inspection. We serve homeowners across Massachusetts with the craftsmanship and transparency the project deserves.
Call us at (508) 748-5468 or reach out online to get your free estimate. Let’s build the shower your bathroom should have had all along.